This topic contains the steps to set up a template:
Creating a New Template
- From the splash screen, under Create a New Template, add a file by selecting one of the following:
- Drop a File Here
- Click to Select a File
- For this example, choose Click to Select a File:
- The Open dialog box displays. Browse to the file location, click on the file and click Open:
- The template displays in the E-signing window:
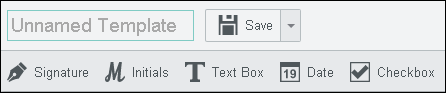
- In the upper left corner, click in the Unnamed Template field. Type in a name for the template and click Save:
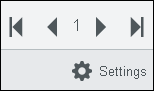
- To make Global Settings for the template, click Settings:
- The Global Template Settings dialog box displays:
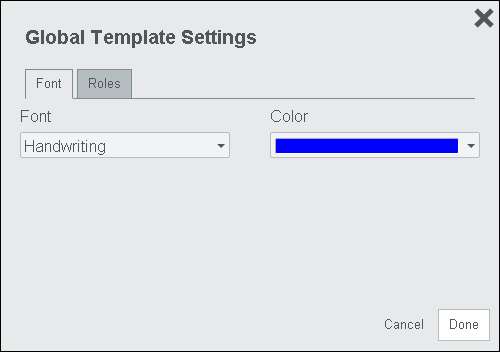
- Select the Font type and/or Color as desired. If you want to create Roles for the template, refer to the section below, "Adding Roles".
 |
Note that when you select a font or color in the Global Template Settings dialog box, it is the default setting for the Text Box and Date fields that you create in the Template. You can override the font or color on a per field basis if desired. |
- Once you are finished making selections in the Global Template Settings dialog box, click Done.
Viewing Required Fields
Required fields can easily be seen by the red indicator in the upper right-hand corner:

Once you click on the required field, the indicator will disappear. When you click outside of the required field, the red indicator will reappear in the upper right-hand corner.
Adjusting a Field's Position
Arrow Keys
You can move or 'nudge' the position of a field by using your keyboard's arrow keys. Click on the field you want to move, then select the up, down, left or right arrow key on the keyboard to move the field to the desired location on the form.
Group Properties Panel
- You can align and match the size of multiple fields at one time by using the Ctrl key and clicking on the fields you want to align:
- Then select Match Size and Vertical Alignment as shown in yellow highlight below:
|
You can align and match the size for the signature, initials, text box, and date fields. |
Sorting Fields
Use the following steps to sort fields that you have created:
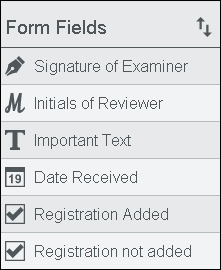
- After you add some fields to the template, you will see them displayed in the Form Navigator to the right of the template:
- You can sort the Form Field names so the proper tab order is created for signing. Click on the arrows (highlighted in blue below) to activate the sorting feature. Click on the bars (highlighted in yellow below) to drag the Form Field name up or down in the list:
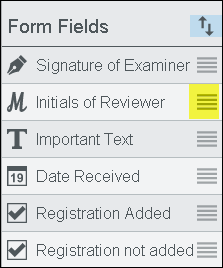
- After you have moved the fields as desired, click on the arrows again to de-activate the sorting feature.
Editing, Duplicating or Deleting a Field
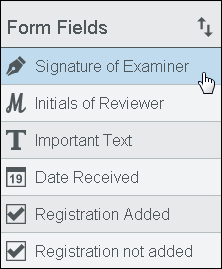
- You can easily modify the fields from the Form Navigator by clicking on the Display Name of the field. For example, click on Signature of Examiner to edit that field:
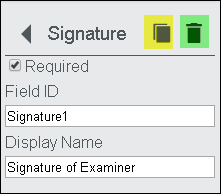
- The Properties Panel displays and you can edit the contents of this pane as desired.
- To draw multiple signatures at a time, click on the Duplicate icon, highlighted in yellow below.
- To delete a signature field on the form, click on the Delete button, highlighted in green below:
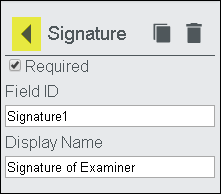
- When you are finished, click on the Return button (highlighted in yellow below) to go back to the Form Navigator:
Saving the Template
Use the following steps to save the template:
Save the Template
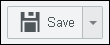
- To save the template you created, click Save on the toolbar at the top of the Viewing Client window:
- A check mark appears on the Save button to indicate your changes have been saved.
Save a Copy of the Template
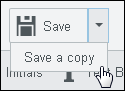
- To save a copy of the template you created with a different name, click the Save drop-down and select Save a copy:
- A copy of the template is created. Click in the Name Field and enter the new template name:

- Click Save to save the new template.
|
If you exit a template without saving your changes, a message appears, "Confirm Navigation - Warning: You have unsaved changes, save before continuing. Are you sure you want to leave this page?" Click 'Leave this Page' to exit without saving changes or click 'Stay on this Page' to save your changes. |
Deleting the Template
Use the following steps to delete a template:
- From the splash screen, under the heading 'View an Existing Template', you will see the list of available templates:
- Scroll to the template you want to delete.
- Click Delete and a message appears, "Are you sure you want to delete this template?"
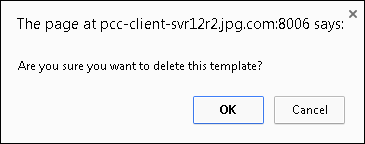
- Select OK to delete the template (or Cancel to keep the template).